
Is your golf cart suddenly stuck in neutral, refusing to budge despite a healthy battery? How to Test a Golf Cart Solenoid? The culprit might be a malfunctioning solenoid, the silent conductor behind your electric cart’s movement. But before you call in a mechanic, consider taking matters into your own hands.
Testing a golf cart solenoid is a surprisingly simple process that requires minimal tools and can save you time and money. In this guide, we’ll describe the secrets of solenoid testing, empowering you to diagnose the issue and get your golf cart cruising again. With clear instructions, you’ll be well on your way to becoming a golf cart troubleshooting pro.
So, grab your tools, put on your mechanic hat, and let’s get started on reviving your electric steed.
What is a Solenoid?
Think of the solenoid as a muscular switch. When you press the accelerator, a small electrical current energizes the solenoid’s coil, creating a magnetic field. This magnetism pulls a metal plunger inside, completing a high-power circuit that sends electricity to the motor. In simpler terms, the solenoid acts like a bridge between your “go” signal and the motor that propels the cart.
Understanding the Solenoid’s Role
Imagine the solenoid as a muscular switch. When you press the accelerator, a small amount of current energizes the solenoid’s coil, creating a magnetic field. This magnetism then throws a metal plunger inside, connecting two large terminals. This connection allows high current to flow from the battery to the motor, propelling your cart forward.
Signs of a Failing Solenoid
Before diving into testing, keep an eye out for these common symptoms:
- The cart is completely dead: No lights, no whirring sound, nothing happens when you turn the key.
- The cart sputters or jerks when starting.
- You hear a clicking noise, but the cart doesn’t move.
How to Test a Golf Cart Solenoid? Step-by-Step guides:
Safety measures: Prior to starting, make sure the golf cart is powered off and the key has been taken out of the ignition. Put on safety goggles and gloves for your protection.
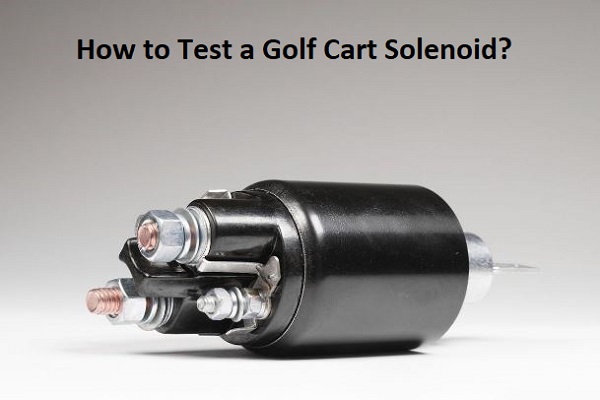
- Locate the Solenoid
The solenoid is commonly found in the golf cart’s engine area. It is a cylindrical part with several terminals and is generally linked to the battery, controller, and motor.
2. Examine the Wiring
visually examine the solenoid and its wiring for any indications of damage, loose connections, or corrosion. If any problems are detected, deal with them before moving forward.
3. Set your digital multimeter to the voltage (V) setting when testing for voltage.
- Make sure to turn the key off and not press the cart’s pedal before checking the voltage between the two large terminals of the solenoid.
- You are required to measure the complete battery pack voltage (e.g., 36 volts, 48 volts) at these terminals.
- Absence of voltage or a notable decrease in voltage levels may suggest an issue with the solenoid or its connections.
4. To check the Activation Circuit, enlist the assistance of a companion or make use of a jumper wire.
- Turn the key to the “on” position and press down on the accelerator pedal to activate the solenoid.
- Measure the voltage across the two small terminals using a multimeter when the solenoid is activated.
- Please double-check the overall voltage of the battery pack (e.g., 36 volts, 48 volts).
- Insufficient voltage or a significant voltage drop may indicate a problem with the solenoid coil or the activation circuit.
5. You can test the continuity of the solenoid if you suspect it is faulty.
- Switch off the ignition and detach the wires from the small terminals of the solenoid.
- Adjust the multimeter to the continuity or resistance (ohms) mode.
- Position one multimeter probe on each small terminal.
- You should either hear a beep or observe a low resistance reading on the multimeter, signaling continuity.
- A faulty solenoid may be the cause if there is no continuity.
If you have identified that the solenoid is defective or not working properly following the tests mentioned earlier, it is recommended to swap it out with a new one. Be sure to select a replacement solenoid that is compatible with your golf cart model.
Reconnect the wires securely to their respective terminals after replacing the solenoid.
Test the Cart: Activate the key and check the cart to confirm that it functions as anticipated. Verify that the solenoid produces a clicking sound and the cart responds to the accelerator pedal being pressed.
Read also more related topics: How to Check Golf Cart Battery Water Level?
How Long Does a Golf Cart Battery Last?
And, How to Fix Electric Club Car Golf Cart Jerky Acceleration?
How to Test a Golf Cart Solinoid- The Step by short Process
- Tools You’ll Need:
- Multimeter (a handy tool for measuring electrical properties)
- Wrench (size may vary depending on your cart)
- Safety First!
- Always park your cart on a level surface and engage the parking brake.
- Turn off the cart and remove the key before starting any work.
- Testing the Solenoid:
Locate the Solenoid: Typically found near the battery or behind the passenger seat. It’s a cylindrical object with wires connected to it.
Disconnect the Battery (Optional but recommended for some procedures): Consult your cart’s manual for specific instructions.
Test the Coil (Continuity)
- Set your multimeter to the ohms (Ω) setting.
- Touch one probe to each of the smaller terminals on the solenoid. (These are usually marked with an “S” or have smaller gauge wires compared to the large battery cables).
- With the key off, the meter should display an open circuit (OL or infinity).
- If you get a reading (anything other than OL), the coil is likely fried, and you’ll need a new solenoid.
- Test the Circuit Completion (Voltage)
- Switch the multimeter to DC volts (DCV) on a high enough range to accommodate your battery voltage (usually 12V or 48V).
- Leave one probe on a small terminal. Touch the other probe to a large terminal.
- Turn the key to the “On” position and press the accelerator pedal.
- A clicking sound should be heard, and the multimeter should display a reading close to battery voltage. This indicates the circuit is completing successfully.
- Repeat the process with the other large terminal.
- Interpreting the Results
- Scenario 1: No Click & High Resistance – If you hear no click in either step, and the resistance readings are high (or infinite) throughout, it’s highly likely the solenoid is bad.
- Scenario 2: Click But Hig Resistance on Large Terminals – A click with a high resistance reading on the large terminals after the click suggests an issue within the high-current circuit of the solenoid. Replacement is recommended.
- Scenario 3: Click & Low Resistance Readings – Congratulations! If you hear a click in both steps, and the resistance readings on both small and large terminals are low (below 0.4 ohms). Your solenoid is functioning properly.
These are general guidelines. Always consult your golf cart’s service manual for specific instructions and safety precautions.
Last Word
In conclusion, testing your golf cart solenoid might seem daunting, but with a basic understanding and the right tools, you can become your own golf cart detective. Remember, safety first. Always disconnect the battery before working on electrical components. You’ll gain valuable insight into the health of your solenoid. This empowers you to make informed decisions.
If a simple replacement gets your cart zipping around again, you’ve saved yourself the cost of a technician. But if the problem runs deeper, you’ll be well-equipped to explain the issue to a professional, ensuring a more efficient repair process. So, grab your multimeter, embrace the DIY spirit, and get ready to diagnose your golf cart’s electrical pulse with confidence.